How to Manually Install Adapters on Windows 10?
Windows 10 has built-in drivers for some adapters, so they can work on Windows 10 automatically. But if there are no built-in drivers for your adapter, or you want to upgrade the driver for it, the following instruction may help:
1. Insert the adapter into your computer.
2. Download the updated driver and extract it.
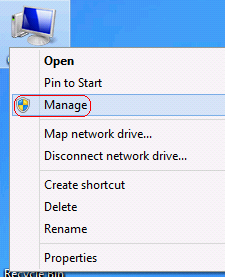
3. Right-click on Computer Icon, and then click Manage.

NOTE: If you are not an administrator, you will be prompted to type an administrator password, and then click “Yes”.

Note: If there isn’t a Computer Icon on your desktop, please refer to the instruction below to find the computer management.
Press “Windows key + X”, and click on computer management.

4. Open Device Manager. Right-click the adapter and then click Update Driver Software….

5. Click Browse my computer for driver software.

6. Click let me pick from a list of device drivers on my computer and click Next.

7. Highlight Show compatible hardware and click Have Disk.

8. Click Browse and Open the inf file that you have already downloaded and extracted.


Note: Please refer to the instruction below to confirm the operating system and system type of your computer.
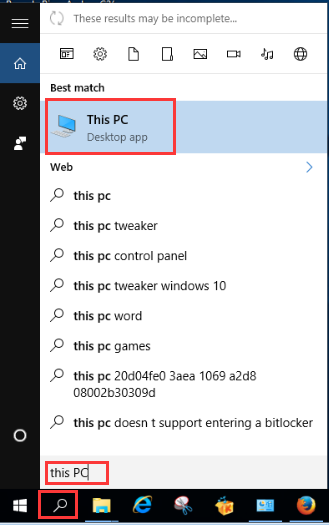
- Please click on the “search” on the taskbar and type in “This PC”, then you can find the desktop app.

- Please right-click on This PC, then choose Properties.

- Please confirm your operating system referring to this picture:

9. Please click OK and go to Next;

10. Then the adapter will be installed successfully and click on Close.
